Sunday 30 March 2014

Nimbus Nail Art (The Nailasaurus' technique)


Hello all!

For today's design, I recreated the Nimbus Nails from The Nailasaurus. Mine look a bit different from hers but I looooove how they turned out!
I used The Nailusaurus great tutorial, which you can find here.


Everything is explained very clearly in her tutorial, so I will not elaborate here on how I created these nails as I just followed her tutorial. I did however change one thing: instead of acetone, I just used nail polish remover to thin the polish (because I don't own acetone, to be honest).

I think that because of the remover, my design turned out a bit different: the layers of polish are not so thin as The Nailasaurus' layers are. I don't mind this at all however, because I adore how these nails turned out!

I used my new purple polishes fom Guylond, which unfortunately do not have a name - I bought them in a "create ombre nails" pack together. The one big polish on the left is nr. 12 from Hema.


I also added two gold studs because I like the combination of purple and gold :)


So, do you like these? They were definitely a lot of fun to make, so I will try to create these again with some other colours!

Thanks for reading!

Saturday 29 March 2014

Pinterest account

Hi everyone!

Just a quick post today to tell you that I made a Pinterest account!

So if you have Pinterest you can follow me there and pin things and stuff like that (yeah I'm still figuring out how it works exactly but I'll get there)


And that's it! Bye ;)

Tuesday 25 March 2014

Blue Shimmer Nails #2


Hi everyone!

Just a quick post for today! I did these blue shimmer nails a few days ago when I didn't have a lot of time to create an intricate nail art design. I had already done this design before (you can see it here) so it was easy to create again :)

For this design I used:
Black on Black - Sinful Colors
DS Lapis - OPI


It's very simple to do:

First I painted my nails black with two coats.
Then I put some DS Lapis onto a piece of paper and dabbed in it with some plastic wrap I had rolled into a little ball. I then just dabbed this onto my nails and added a shiny topcoat (because DS Lapis dries to a matte finish with sparkles in it).

I added some studs on my ring finger and that's it!


I hope you like it! And I hope you don't mind my recreating a design I did earlier - when I don't have a lot of time I just do something very simple or something I have done before and really liked. And I did realllllly love this design!

(plus, this post made me realize that I am getting better and better at taking pictures and editing them, right? I can really see the difference with the pictures from a few months ago)

Thanks for reading!

Friday 21 March 2014

Maybelline Brocades - Knitted Gold


Hi lovelies!

I have a swatch of another great polish for you!
In one of my (many) recent polish hauls I got Knitted Gold from the Maybelline New York Brocades Collection. I had seen some gorgeous swatches of this polish and it was on my wishlist for some time now, until I finally spotted it!


Knitted Gold is a very sheer polish. It has an amazing golden shine and is packed with tiny light pink glitters. Absolutely gorgeous. I decided to pair it up with Muchi, Muchi because this light pink Essie polish seemed fitting.


I wasn't entirely able to capture the amazing gold shimmer of this polish, to my regrets. I took about a million pictures (okay, that's maybe a small exaggeration) but the absolute gorgeousness got lost a bit in every one...
I mean, you can of course see the gold shimmer in the pictures here, but from certain angles the pink polish underneath is just not visible anymore because the entire nail is gold shimmer - which is what I couldn't capture on camera.

I hope you'll forgive me, and next time I'm wearing this great polish I'll definitely try to capture its magnificence better! Thanks for reading!

Thursday 20 March 2014

The Blogger Friendship Award

Hi everyone!

Today's post will not be a nail art design from me, but will be filled with lots of amazing other nail art bloggers!


A while back Lucy from The Nail Snail nominated me for the Blogger Friendship Award (you can see her blogpost here), but because I had just done the Versatile Blogger Award I decided to wait a bit with this new award. And then, well honestly, I just lost track of it and it was only until I recently got the Shine On Award from Craftynail that I remembered it again. Big oops on my part... But I guess we all let some things slip our minds sometimes.

And I'm making up for it with today's post!

The rules of the Blogger Friendship Award are the following (or as I understand them anyway):
You state 7 things about yourself that people don't know yet, and you nominate 7 other bloggers you like (and tell them they were nominated).


First up are the 7 facts about me! This is quite hard actually, because I've already told you a lot about myself for my previous award (you can read that post here if you're interested in some more random facts about me) and I want to come up with new exciting things :) So here goes!

1. My favourite band is The Wombats! They are not super famous where I live, which is actually something I really like because the concerts are small (I don't like big concerts, it's so crowded!)

2. My hair colour is blonde.

3. I love watching old movies from the 1950's and 1960's. I'm not sure why, but I just really like the entire style and feeling of them. (okay, I already sort of used this fact in the Versatile Blogger Award, but now it's a bit more specific)

4. Right now I'm watching Merlin, the BBC series (I haven't finished it yet, I'm starting season 5!)

5. I study English and Dutch literature and linguistics at the university. I love reading and writing, and I love learning things about my language.

6. I don't like eating Belgian endive. At all. It is blegh. Ugh. Brrr. For those of you who don't know what it is, here's a lovely picture:


7. But I do like sprouts! Which is something a lot of people don't like, but I really like it.

Okay, pff. Sometimes it's really hard to come up with interesting things about me! And I'll have to do this again for the Shine On Award! Which Ill be doing once I have enough inspiration for some more random Robin facts.

Now on to the 7 blogs I nominate:

1. Craftynail
2. Dahlia Nails
3. Fife Fantasi Nails
4. GioNails
5. The Sequined Nail
6. Brijits Digits
7. Lacqueerisa

These are all GREAT nail art blogs I love following, so you should definitely go check them out! Each and every one of them has amazing nail art and they are all lovely people.

I have some more other great blogs to nominate, but I'm keeping that for the Shine On Award ;)

Okay, that's it for today's post! I hope you go visit these blogs and discover some great new nail art!

Tuesday 18 March 2014

OPI's Push and Shove


Hello lovely people!

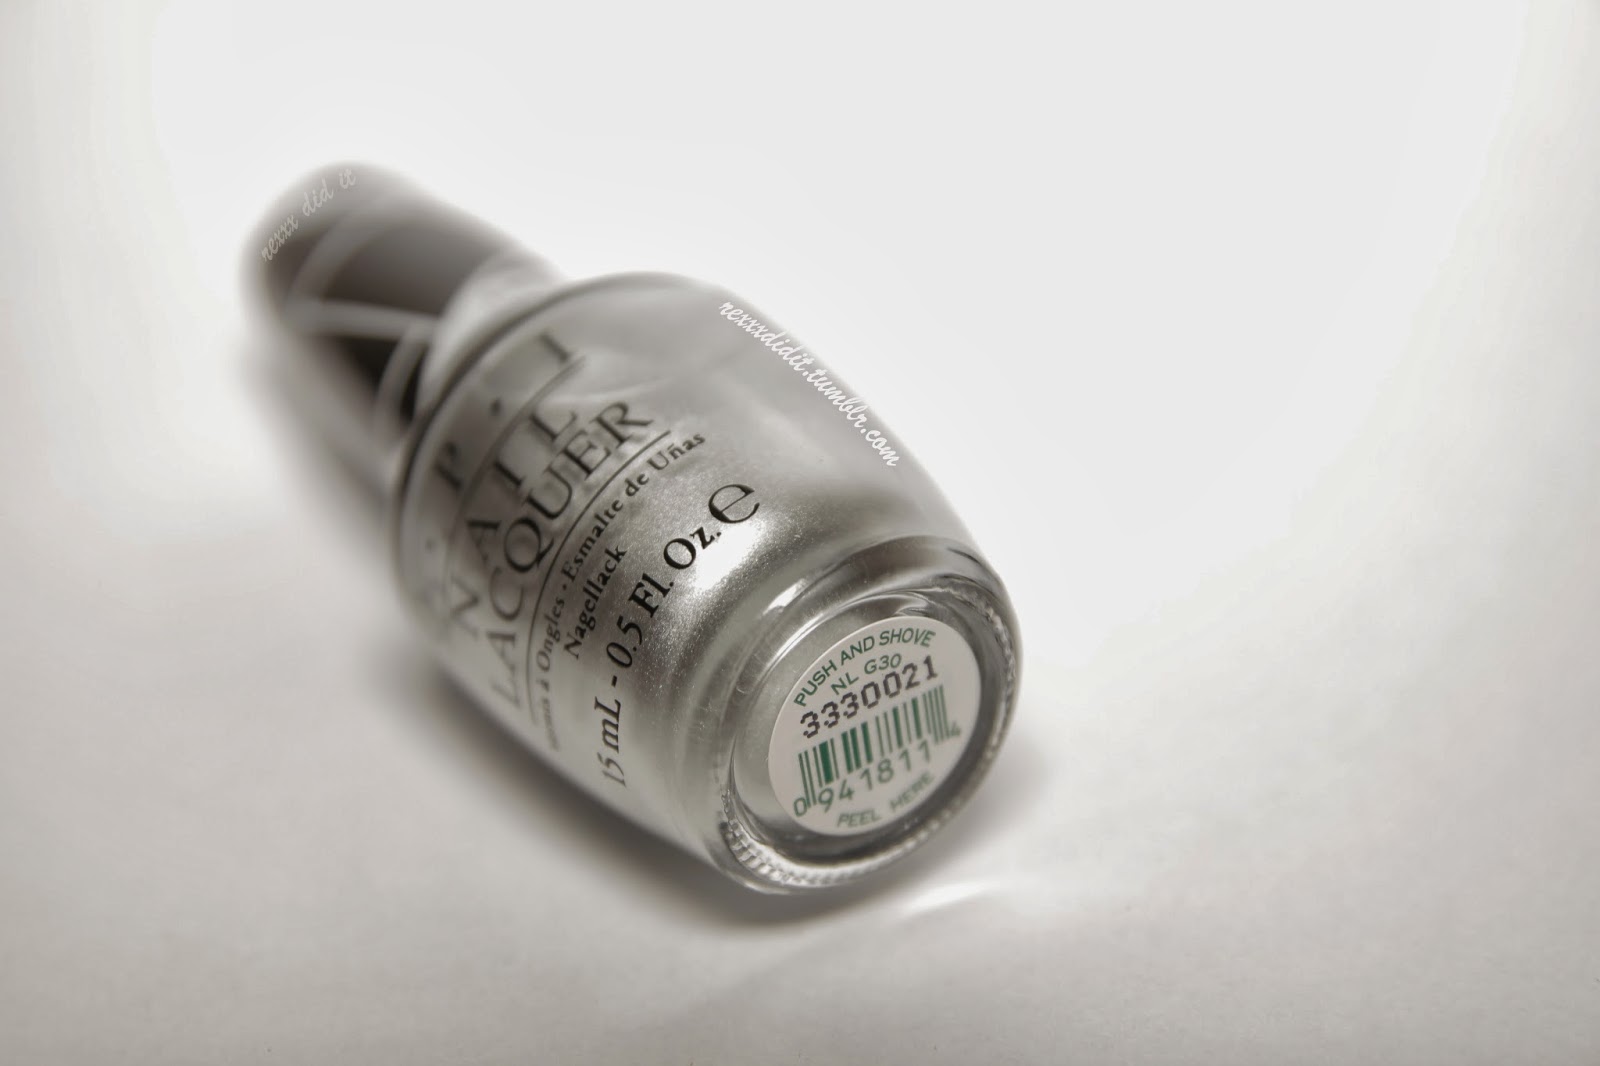
Today I am suuuuper glad to present OPI's Push and Shove to you!

Some of you might know that I really wanted this polish when it came out, but I couldn't find it anywhere... OPI polishes aren't sold in a lot of stores in my country (only in 1 store I know actually). I had sent my mom to that store on January 4th to buy it, but they told her the entire Gwen Stefani collection was already sold out.

When I went to the store last week, I suddenly saw the whole collection! Every polish was suddenly there. I was so amazed and immediately bought Push and Shove.


I had always assumed that the collection would come out in every country on the same date. But after I had bought Push and Shove, I read in a Belgium magazine that the Gwen Stefani collection only came out in Belgium in March. So I'm thinking now that the shopkeepers really didn't know what they were talking about, and that when my mom asked them if the collection wasn't available yet, they just told her something to get rid of her :/

But anyway, I have it now!


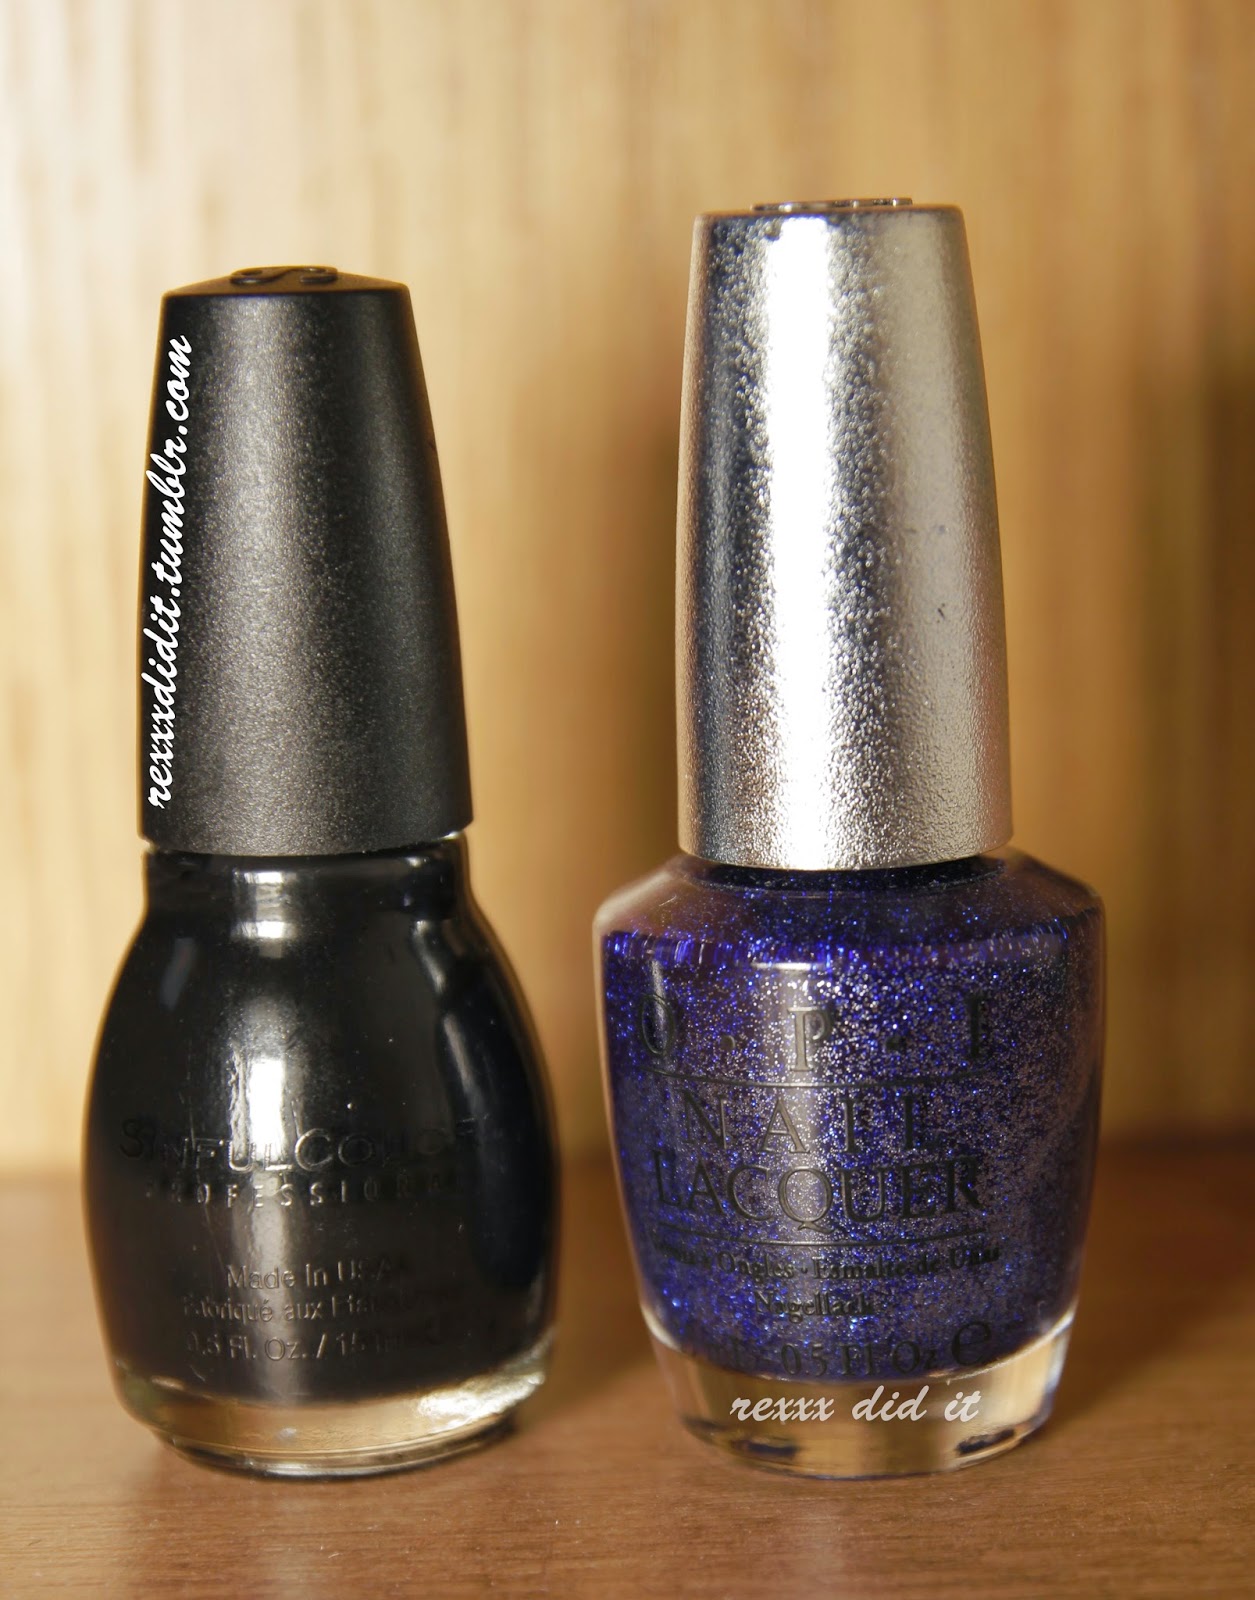
As you already know, Push and Shove comes with a special base coat - Lay Down that Base - you need to use. If you use another base coat, Push and Shove will just glide off your nail - and I have experienced this when I tested it.
Some bloggers didn't have a problem when they used another polish as a base coat, but I did.


OPI also says you cannot use a top coat over this polish because it would reduce the mirror like finish, so I didn't at first - on these pictures I'm not wearing top coat.

But after taking the pictures, I was afraid my polish would peel off my nails quickly since it's intended for one night only. So I applied top coat, and I hardly notice any difference to be honest. Maybe it's slightly less shiny, but this could just as well be my imagination. And: the polish stayed on for three days! And then I just took it off myself because I wanted to do something else with my nails :)

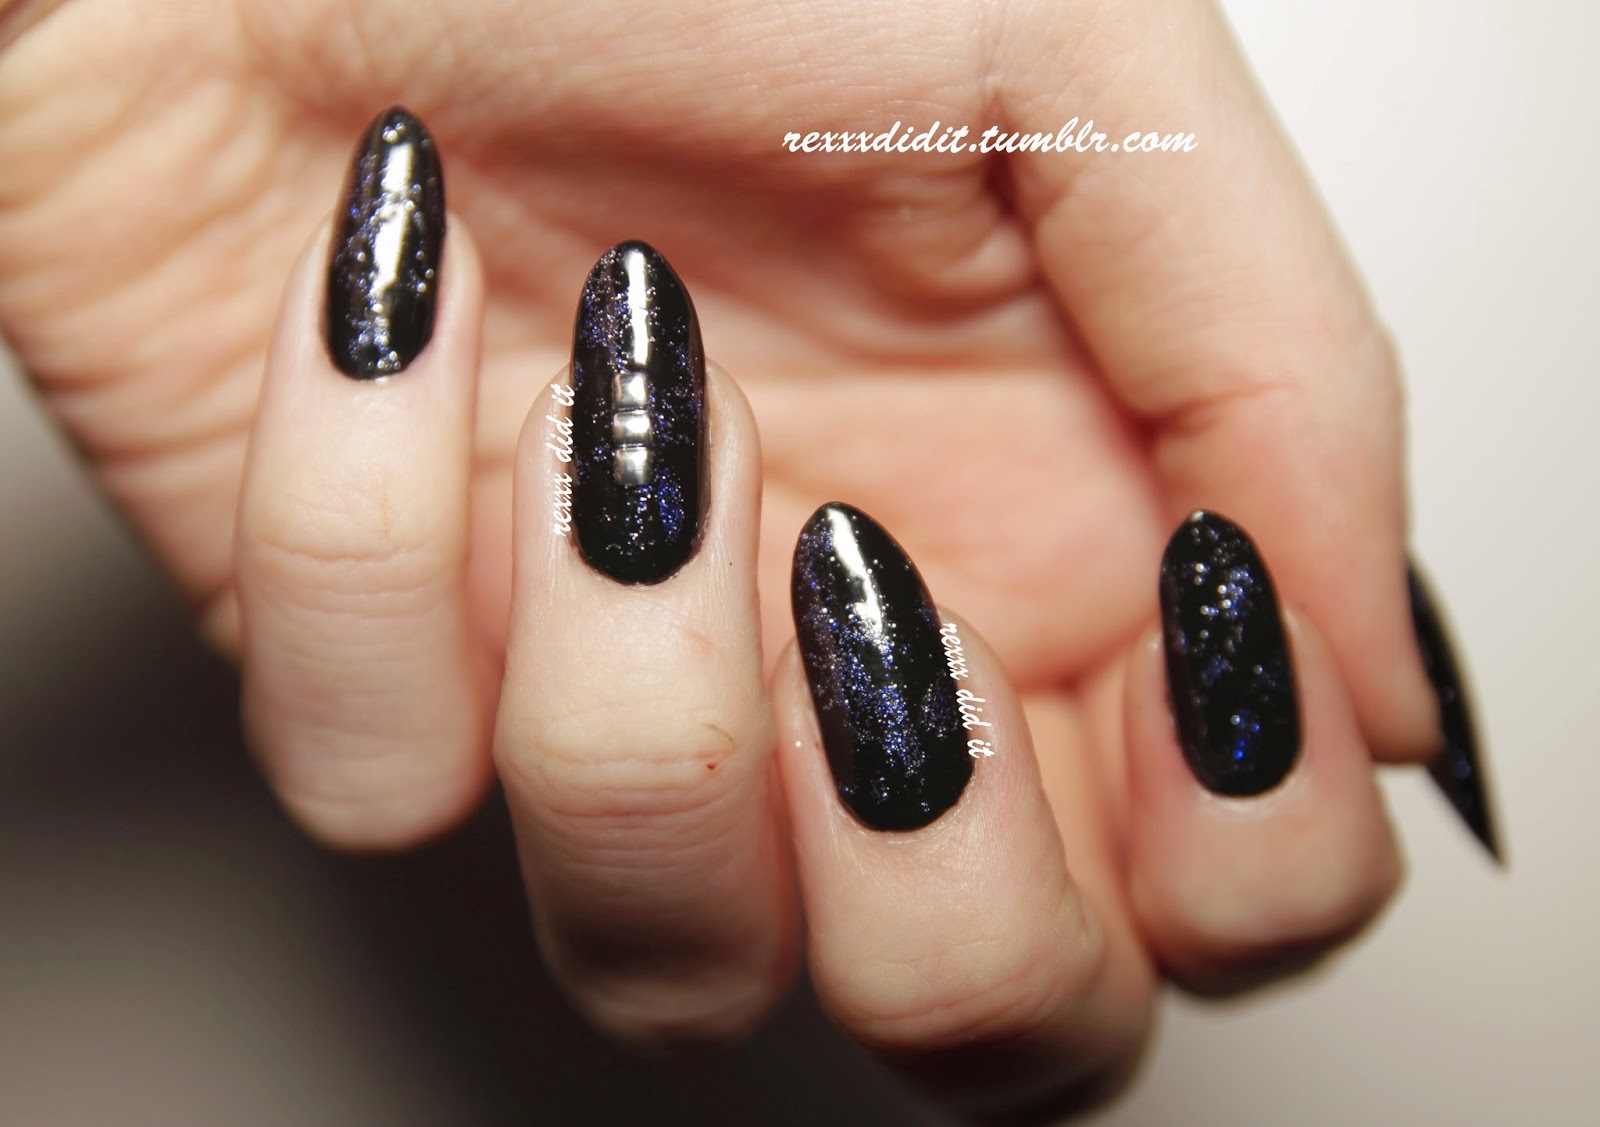
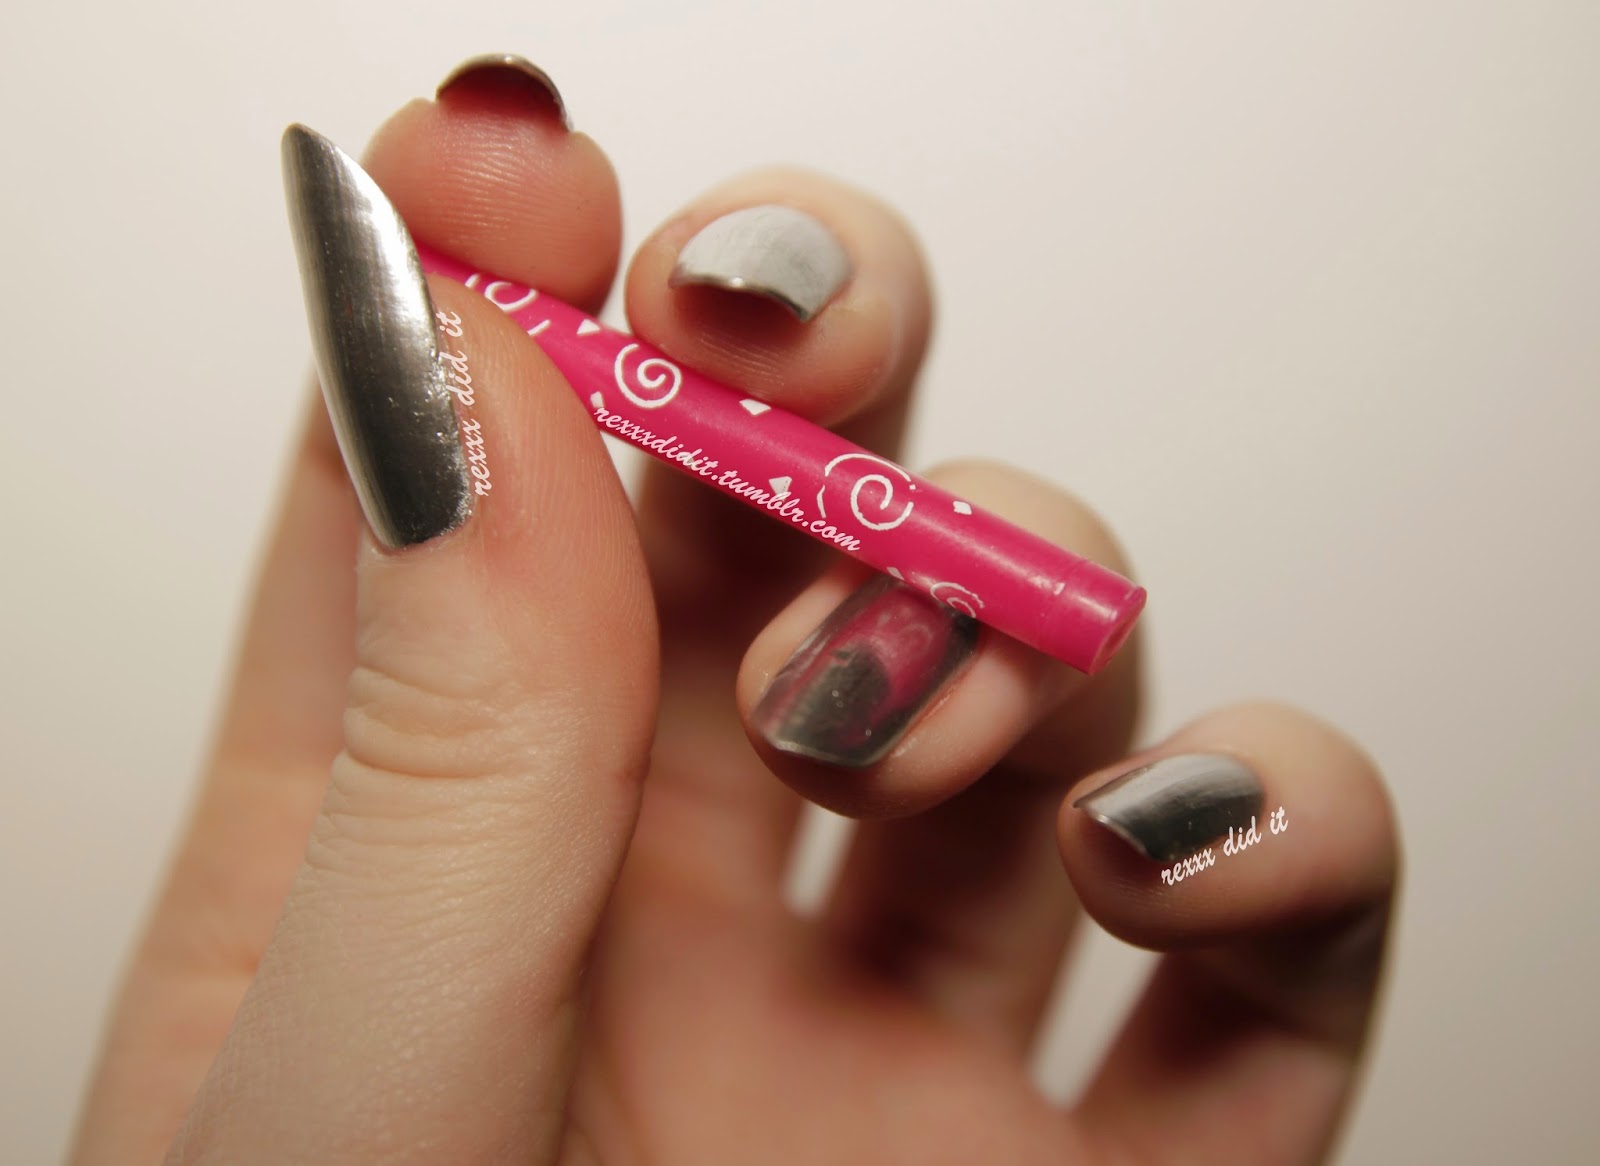
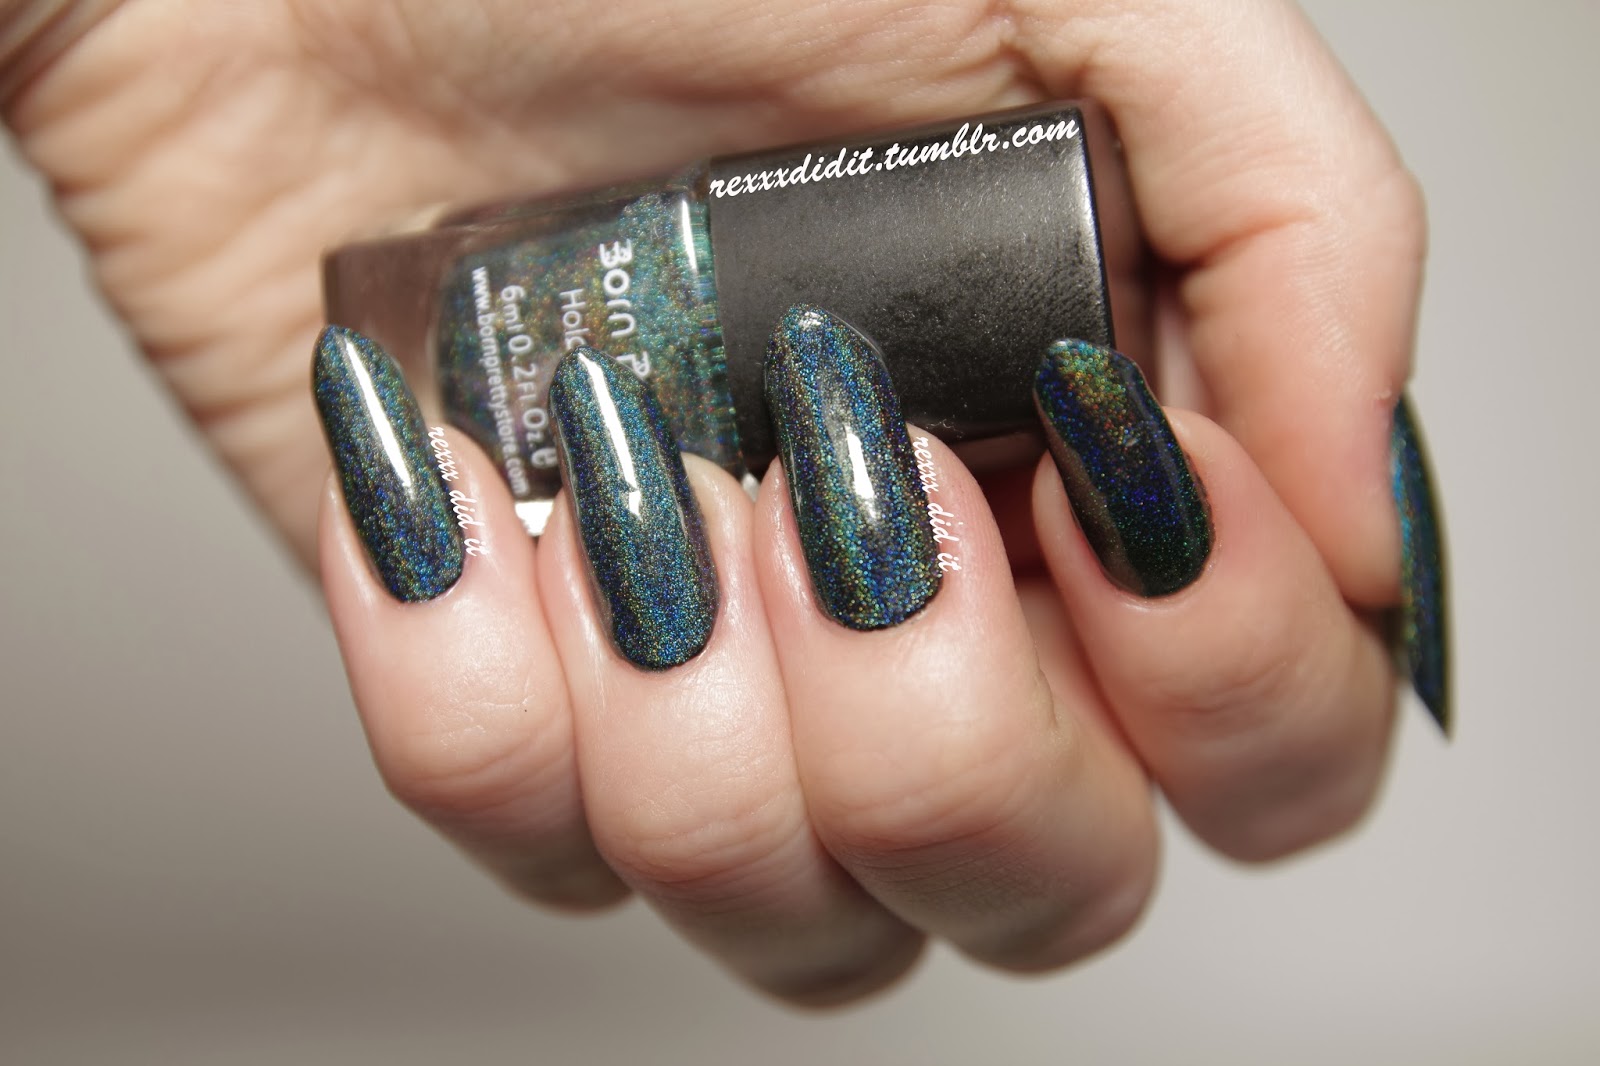
Push and Shove is a metallic chrome polish with a mirror like finish. It shows every imperfection on your nails, so I was a bit afraid what the effect would be on me - I decided to not use a ridge filling basecoat this time, because I wanted to see what the effect of the polish was without that.

But it turned out quite well!


My nails have some imperfections which you can see in Push and Shove, but all in all I was pleasantly surprised. I think this polish would of course look even better when you first apply some ridge filling basecoat before Lay Down that Base, but I like it this way as well. You can also see some sthe brush strokes a bit, but this is normal for a polish with chrome finish.

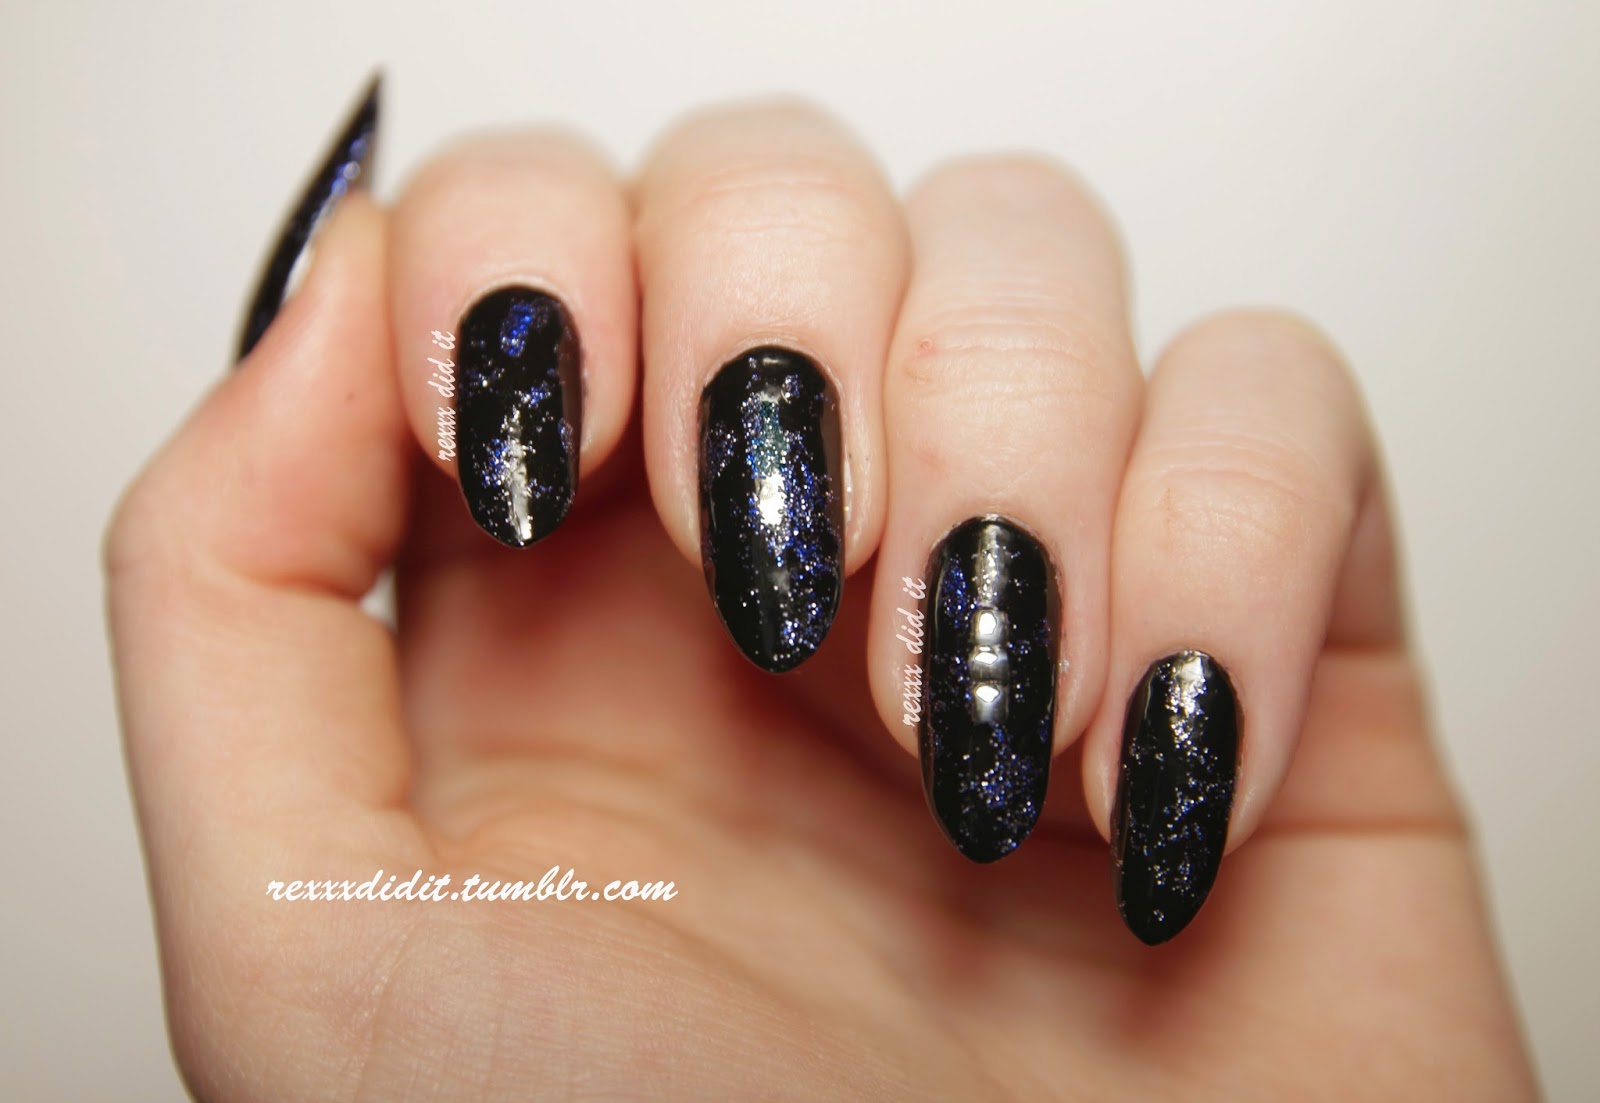
And yes, I took a picture holding a princess crown because it was the first shiny silvery object I could find :)

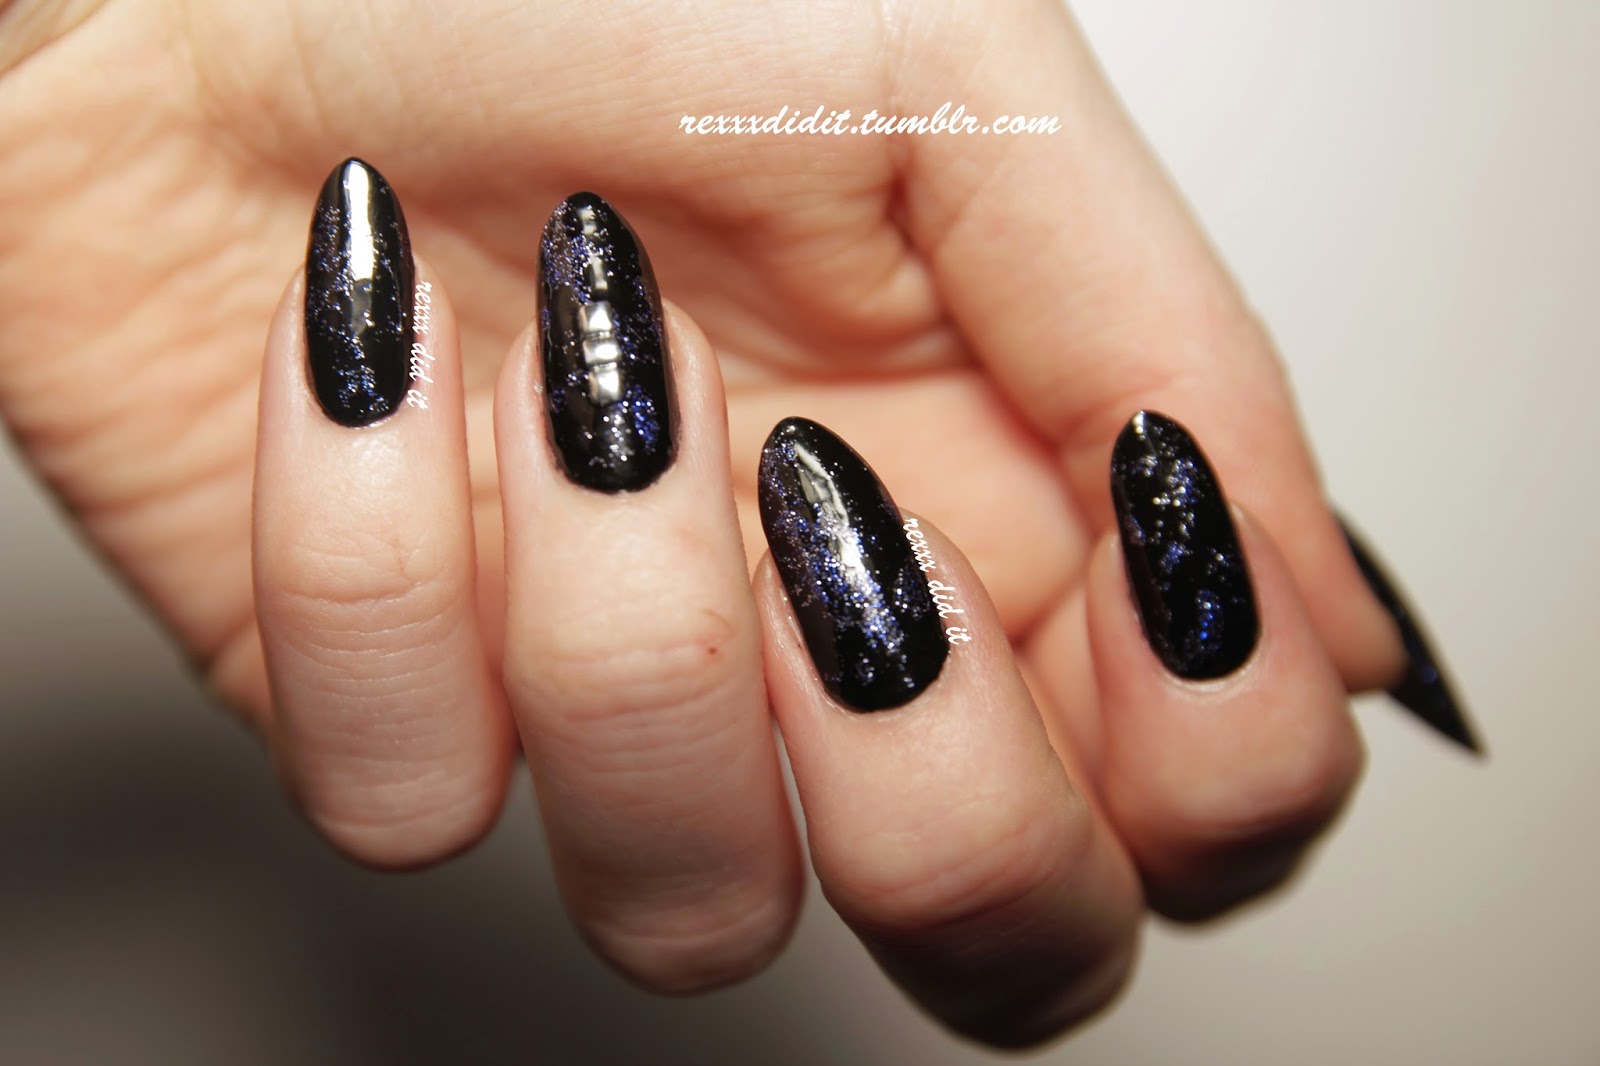
Now one last picture to show you the mirror effect! I was really amazed by this:


As you can see, the candle is mirrored on my ring finger :) I'm sorry for the amount of weird objects I used for this photoshoot, they are all things that were still lying around from my birthday party haha.

So, did you snatch up any of the Gwen Stefani polishes? I was severly doubting to buy Love.Angel.Music.Baby or 4 In The Morning, but since I already had bought a ton of polishes recently, I decided it would be best for my wallet to not spend €15 on another polish.

Thanks for reading!

Thursday 13 March 2014

Sweet Cherry Bomb - Guest Post over at The Nail Snail!


Hi all!

Today I don't have a post for you! Or well, I do have a post, but not here!
I'm doing a guest post over at The Nail Snail to help Lucy out. This is my first guest post ever, so be sure to check it out! Lucy does amazing nail art herself, so if you have the time, definitely go browse through her designs :)

I'm really happy with how my design turned out and it's so fun to do a guest post because it makes me feel like a real part of the nail art community :)

That's all for here, but there are a lot more pictures over at The Nail Snail!

Wednesday 12 March 2014

BornPretty Store Giveaway

Hi everyone!

BornPretty Store has contacted me to organize a giveaway in order to promote their new Tumblr page.
This is the first giveaway I'm ever organizing, so I hope everything goes well :)

I have bought some things from BornPretty Store in the past and I've been very happy with them. You can see a few of my designs with BornPretty Store material here, here and here :)
If you don't know BornPretty Store already, then I suggest you go check it out! They have an enormous amount of nail art supplies, along with other beauty products.

Now, what can you actually win in this giveaway and what are the rules? (please read through everything carefully before entering!)
---------------------------------------------------------------------------------------------

THE PRIZE:
The prize of this giveaway is 12 sets of nail art stickers from BornPretty Store. You can see this item here on their website.

As you can see, there are 20 patterns available. BornPretty Store will choose 12 patterns and send these to the winner. Just to avoid confusion: 1 set of stickers consists of 12 stickers in 6 different sizes and one pattern. The prize is 12 of these sets, so at a value of $12!

I have not used these nail art stickers myself yet, but I have looked up some reviews and people who have used these stickers are very happy with them :)


THE RULES:
Since it's a giveaway to promote the BornPretty Store Tumblr, you have to:

1. Follow BornPretty Store on Tumblr: http://bornpretty2014.tumblr.com/
2. Share the news about the giveaway AND the coupon code TMX31 on Tumblr, so that everyone can get 10% off on their purchases at BornPretty Store with the code!
3. Provide your email address so I can contact you in case you win.

You can share this news anyway you like: you can either reblog my original post with the news of the giveaway (here), or you can create your own Tumblr post about the giveaway. Just make sure to also include the coupon code!

You can enter this giveaway by filling out the Rafflecopter widget below.

The giveaway is open internationally (but void where prohibited by law). The giveaway is open to people older than 18. If you are younger, please aks your parents' permission to enter this giveaway.

The giveaway will run for two weeks, from March 12th to March 27th, 11 AM GMTA winner will be randomly chosen with Rafflecopter.The winner will be contacted via email within 48 hours after the giveaway has ended. If the winner does not respond within 48 hours, a second winner will be chosen and the first winner can no longer claim the prize. If the second winner does not respond within 48 hours, a third winner will be chosen and so on. So please be sure to also check your spam folders around the time the giveaway ends!

This giveaway is in no way connected to Tumblr. The prize cannot be exchanged for money. I will check to see if the winner has completed all entries he/she has said they did in the Rafflecopter widget. If the winner has not completed an entry, this will be counted as cheating and another winner will be chosen.

a Rafflecopter giveaway
---------------------------------------------------------------------------------------------

Okay, that's about it for the practical information. I hope everything is clear -  if anything is unclear, please send me a message! This is my first time organizing a giveaway so it's always possible that I have forgot to mention something - but I hope not.

Good luck everyone! :) And don't forget: if you want to go buy something at BornPretty Store, use the coupon code TMX31 to get 10% off on your purchases!


Saturday 8 March 2014

Graffiti Effect Top Coat (Street Artist)


Hi everyone!

Today I have the Street Artist effect top coat by Maybelline Color Show for you!
I got this polish from my friends as a birthday present (yes, they do know what I love most - polish!) and I was eager to try it out.

There are four colours in the Street Artist line, and I got Boombox Black. I paired it with OPI's Amazing California Love because I was in the mood for something bright :)


Boombox Black has two colours in it: black and a lime green. At first I thought it was white, but no, it's a light lime green colour. The polish has little black and green bars, some very small circles, and some bigger hexagon shaped things.

This polish gives the effect of graffiti, and I must say that when I have it on my nails it looks so cool! It almost looks like I have painted a wall at home in black and lime green and some of the paint has splattered onto my nails, if you know what I mean :)


I have three coats of Amazing California Love on and two coats of Boombox Black. I did have to move around the circles a bit and re-place them farther away from each other, because otherwise there were a lot of them bundled all together, and I had to fish a bit for the big hexagons. But I didn't mind that at all.

The tricky part about this polish was to get it off, though! But then again, all glitter polishes or special top coat polishes are difficult to remove, so it was to be expected.

That's it, thanks for reading you lovely people! And thank you friends for giving me this great polish ;)

Monday 3 March 2014

Hollar For This Holo!


Picture heavy post today because I looooooove this polish!

On my nails you can see the gorgeous Born Pretty Holographic Holo Glitter Nail Polish Varnish Hologram Effect #12 from Born Pretty Store.
You can see this polish here on their website :)


I bought this polish a few months ago (here's the blogpost about that polish haul back then), but I hadn't used it until now.


I have no idea why I hadn't used this polish yet, because boy it is GORGEOUS! Can you see all those sparkles and the rainbow colours?! And it looks even more amazing in real life than in pictures :)

In all these pictures I have one coat of Hologram Effect #12 on top of one coat of Black on Black by Sinful Colors. First I had put the holo polish on my nails without the black base coat, but I then needed three coats for it to be opaque. But with a black polish underneath, I only needed one coat so I did that.

The colour of the holo polish is normally a tiny bit lighter, a bit more greenish when there isn't any black polish underneath it, but it's not much of a difference.


This is my first holographic polish so I can't compare it to any other holo polishes, but I must say that I reeaaally love this one. I couldn't stop staring at my nails when the sun shone on them :)

All pictures above are made with artificial lighting. As you can see, the holographic effect is already really clear. But when my nails were in sunlight the effect was even more amazing! Here's the proof:


AAAAH LOOK AT ALL THE SPARKLES! I went mad when I saw this, I kept waving my hands about in the sunlight haha :)

I also made a gif because I like to make gifs of special effect polishes. The quality isn't the best because the gif has to be small to go on Tumblr and it was too much effort to make another one for here, so it will just have to do :) Anyway, the colour shifts are clear enough in this gif!


Voila, that's it! I am definitely going to buy some more holographic polishes soon because it's sooo pretty (and did I mention all the sparkles?!)
Do you have any recommendations of good brands and pretty holo polishes?

Thanks for reading you lovely people!