Thursday 27 February 2014

Catrice - Mint Me Up


Hello all!

Today I have some swatches of a gorgeous polish for you!


I don't know if you remember my polish haul from a few weeks ago (here's the blogpost), but this Catrice polish was one of my many buys.


It's called Mint Me Up, and it's a mint green (what else right, with that name?) polish with a shimmer of gold in it.


You can already see this shimmer in the bottle, and it's also very clear in the first picture above and the one here below:


Pretty, right? :) This polish looks very lovely - I just adore the little specks of gold in it.
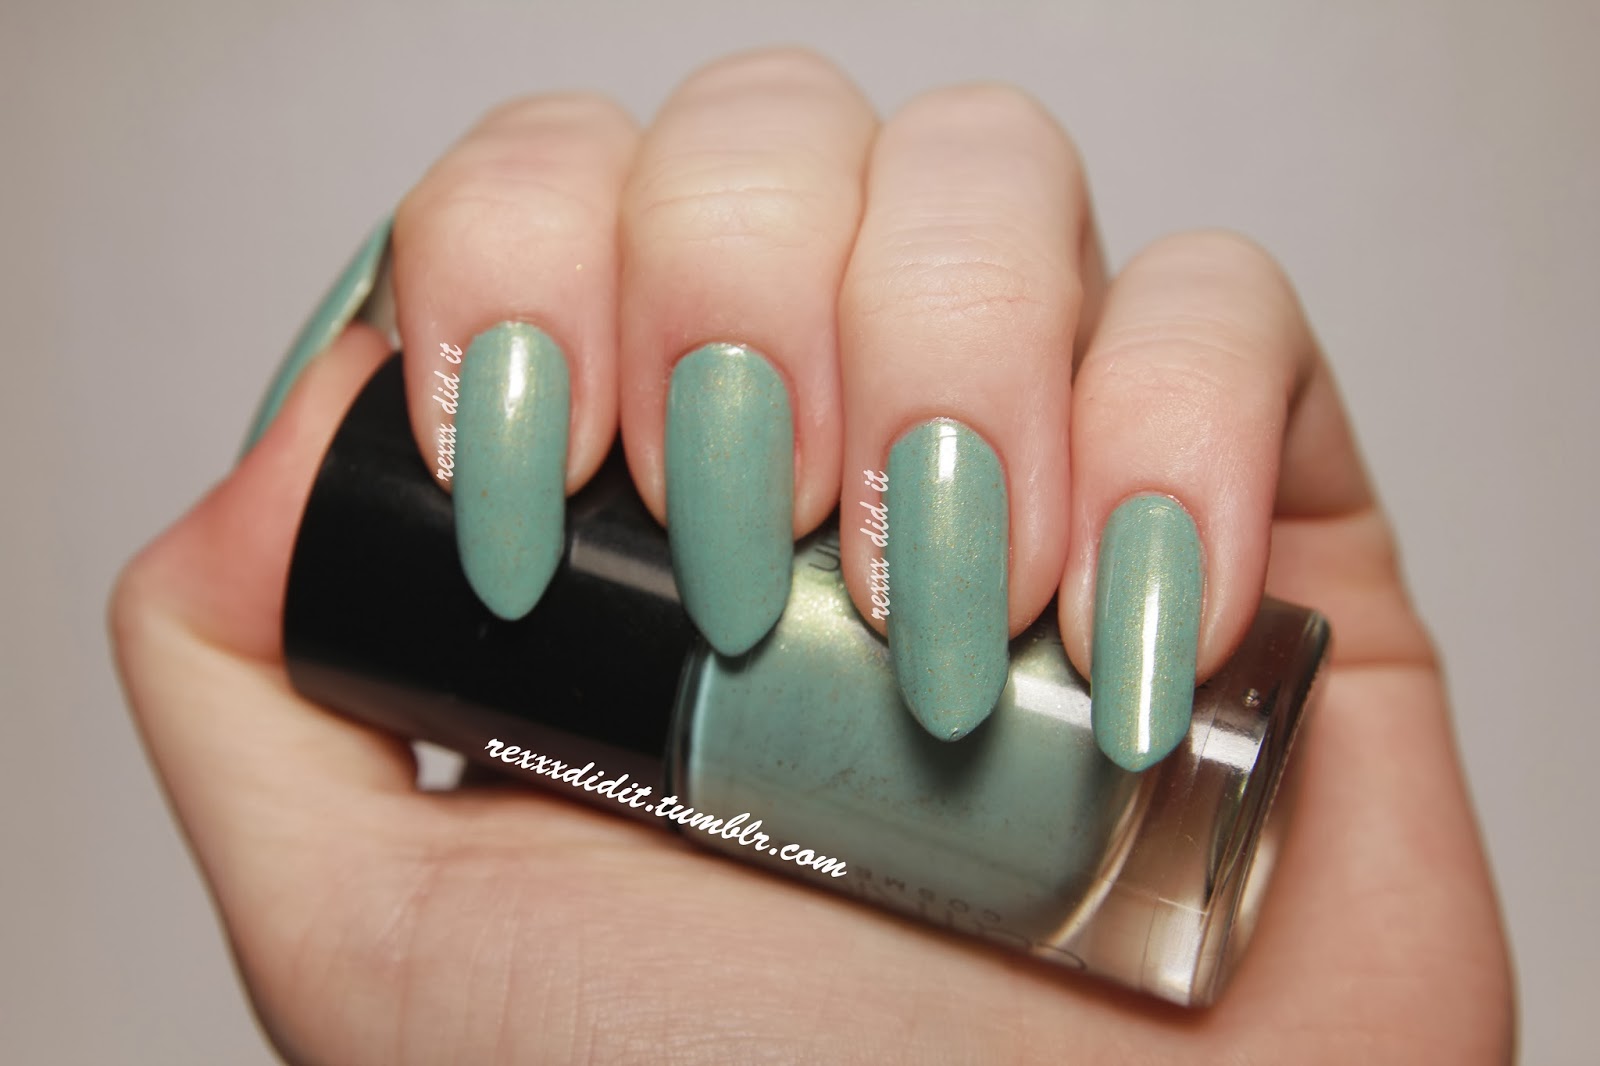
I used three coats here for full coverage and the polish was very easy to apply.


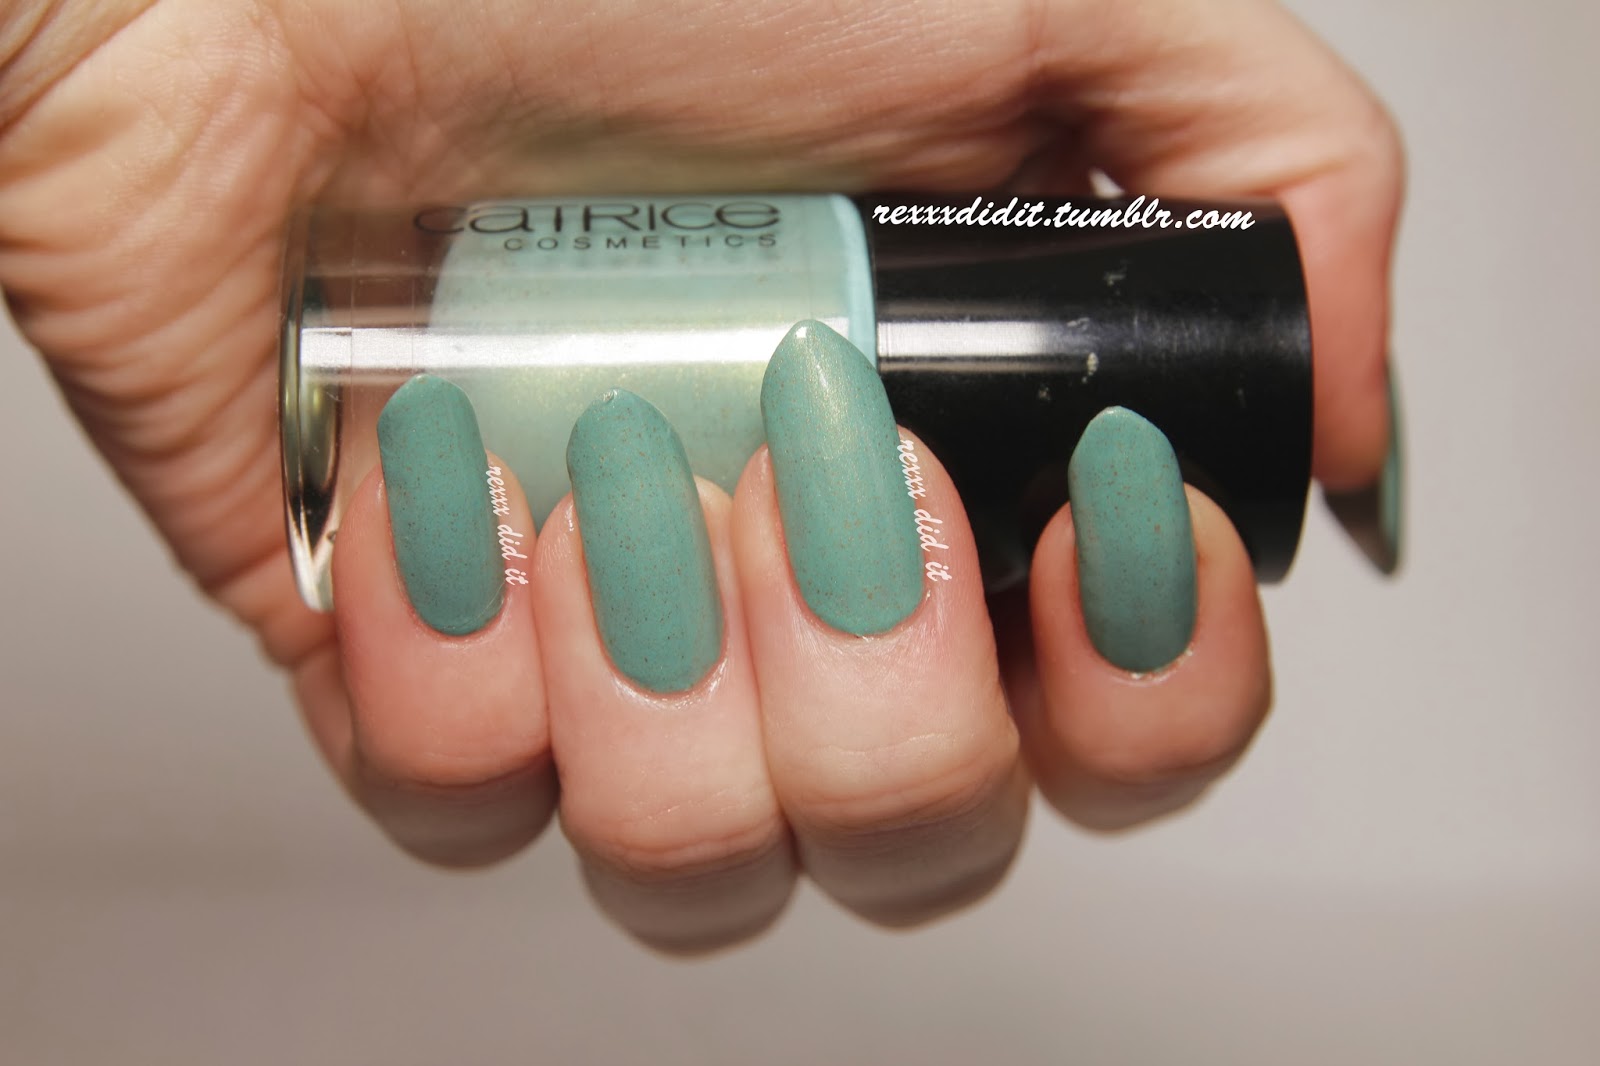
In the picture above you can see the specks of gold more clearly (instead of the shimmer, I mean).

So normally, when a lot of light hits my nails, the mint green polish has a golden shimmer.
But when it's a bit more in the shade, you see these tiny dark spots in the polish - those are the gold flecks, but they look blackish when light doesn't hit them directly. I hope you can see what I mean :)


I really like this polish! I already have a polish in a similar colour called Miss Minty by Gosh, but that one is just plain mint green - I've used this polish in this and this design, if you're interested :)

Mint Me Up is very unique in my collection because of the gold shimmer, and it makes the polish instantly more special and spectacular :)

I hope you like it as much as I do! Thanks for reading!

Sunday 23 February 2014

Birthday Manicure!


Hi everyone!

Today is a very special day, because it's my birthday! I'm turning 22 :)
And to celebrate, I did a manicure with all my favourite designs!


On my thumb I have a gorgeous polish: the Dazzling Starry Magical Multicolored Shell Glitter Nail Art Polish Varnish #4 from Bornprettystore. You can see my swatches (and a gif) of this gorgeous polish here!
I used a dark blue polish as a base coat (44 - D'Orleac).

All the other design were created with a dotting tool and/or a small brush.


For the design on my index finger, I used these colours:
Miss Minty - Gosh
FM1 - D'Orleac
Amazing California Love - OPI
Rose Libertine -Rimmel London
15 - Hema (a brand from a local store)

I love floral prints in combination with my mint coloured polish :)

For the houndstooth, I used FM1 - D'Orleac and Black on Black - Sinful Colors. You already know that I love houndstooth!


Then for the polka dot design, I used - again - FM1 by D'Orleac and my favourite red, Big Apple Red by OPI.

I think polka dots are just amazingly cute, and I love the classis polka dot with a red base :)


And for the leopard print I used:
Goldfinger - Catrice
African Queen by Only You, mixed with: Chocolate Chips by Only You (for the leopard spots)
Black on Black - Sinful Colors

Yes, I'm here again with some more leopard print - but it's my birthday so I'm allowed :)


Just one more picture because I adore all these designs :)


And that's it!

I'm looking forward to tonight, because I'm going to an Italian restaurant with my family (I loooove Italian food, mmhhhh). Very much looking forward to all the food haha :)

Thanks for reading lovelies!

Wednesday 19 February 2014

Bright Pink and Orange Leopard Print


Hello everyone!

Today I have a very bright leopard print mani for you!
I was a bit sick of the bad weather, the cold, and all the rain in my country, so I decided to do a very bright leopard design to cheer me up!

These are the colours I used:

Black on Black - Sinful Colors
Mate 01 - D'Orleac
The Pinky And The Brain - Catrice

I started off by painting my nails in the base colour - orange or pink, depending on which nail.


I'm a bit dissapointed in The Pinky And The Brain, I found that it doesn't cover well at all...
I got this polish for free in a promotion, and I already have a really similar bright pink, so it's not a tragedy that this one doesn't cover well, but I was still quite surprised. I needed 4 coats to hide visible nail line...

For the orange polish I needed 3 coats to get full coverage.

After I had applied the base colour, I just made small random spots in either orange or pink with my dotting tool. I let everything dry, and then I made the black lines with a small brush.


And that's it!
I topped everything off with a shiny topcoat. The orange polish is actually a matte polish, but I love it a lot when it's shiny as well (and well, since I have no non-matte orange polish yet, this one has to do for now).


I'm thinking of renaming my blog to "rexxx does leopard print" haha, I do so many leopard print designs. But I can't help it, I just absolutely adore leopard print on my nails!

Hope you like my nails as much as I do and thanks for reading!

Friday 14 February 2014

Opi's Magazine Cover Mouse


Hi everyone!

Just a quick swatch today of the gorgeous Magazine Cover Mouse by OPI. Which is a red polish, so great for a simple Valentine's Day manicure as well ;)

This is, as you can see, a liquid sand polish and
was limited edition - it was part of the Couture De Minnie collection in 2013.


This polish applies very good, it's a bit gritty with the first coat but the second coat evens everything out.

It also lasts for quite long on my nails without tip wear - about 3 days.

This is a textured polish and it dries matte with shiny sparkles in it. You are not supposed to use a topcoat since this effect would then vanish.

However, I applied a top coat to see what it would look like - my nails are like Christmas tree decorations!

Pictures of Magazine Cover Mouse with shiny topcoat are shown below:


In my pictures it seems like the polish (with topcoat) has a very gritty texture, but in real life it really doesn't look so gritty - my camera just decided to add some extra texture here... Maybe it's the artificial lighting I'm using, I don't know.


So, that's it! A quick post for today :)

Do you have any of the Couture De Minnie polishes? I only have this one - it was my first textured polish - and I'm really happy with it :)

Thanks for reading!

Monday 10 February 2014

Valentine's Day Appropriate Leopard Print


Hi everyone!

I probably say this in every post here, but again, I'm super excited about today's design! :)

As you know, it's almost Valentine's Day! I don't celebrate it to be honest, but I did got a lot of inspiration out of it this year! I decided to create a design that was as Valentine-y as possible, with lots of pink and hearts! 

My weak spot is leopard print - it must be my favourite design ever, and it's a simple one to create as well :) I also love a good gradient, so mix those two together with Valentine's Day and you get this:


The colours I used for this design are:
FM1 - D'Orleac
Muchi, Muchi - Essie
Rose Libertine - Rimmel London
The Pinky And The Brain - Catrice
Black on Black - Sinful Colors

As you can see, I started out with a white and pink gradient that I created with a sponge. I used the first three colours from the list above for this:


Then I added leopard print with the Catrice pink. I made some spots in the shape of hearts (3 on each nail) and the rest are just random shaped spots. I used a dotting tool for this.


And finally I used a small brush to add the black lines around the spots and also some little black stripes inbetween the spots where I thought the design was too empty:


That's it! Quite simple but I love the way it came out.

I did find that Muchi Muchi was actually a bit too sheer to create the gradient with. It looks more gradient-y in real life, but the camera didn't want to capture the sheer pink. Next time I'll probably use another, a bit darker pink :)


I hope you like my design! Thanks for reading! :)

Thursday 6 February 2014

Heart Tips


Hello everyone!

Today I have a Valentine's Day inspired manicure for you!
I saw this design a lot in the past few months, but I myself saw it first at Nails by Drinkcitra and ever since I saw it there, I've been wanting to do it myself.

Now, as you may have noticed, I've changed my nail shape! Yes, goodbye square nails and hello almond shape! This heart tips design is just perfect for almond nails and for Valentine's Day, so this was the perfect occasion to try it out!

One of my nails (of my right hand fortunately) had ripped (but was not yet broken off completely, of you know what I mean) and I took the occasion to create the almond shape on it to see how it looked on me. And boy, does it look gorgeous or what?! I'm suuuper happy with this new shape, I feel very elegant :)


The colours I used here are:
847 - Deborah Milano
Caught on the Red Carpet - Catrice


First, I painted my nails with two coats of 847. This polish is just perfect application wise - absolutely flawless. This is really a great nude polish! Here are some swatches:


This polish can be a bit tricky though: it dries rather quickly, so you have to make sure to apply the first layer quickly, and if you make a mistake you shouldn't try to fix it immediately because then part of the polish will already be dry then and you get ugle bumps. Rather, wait and apply a second coat to fix the mistake.

But, once you get the hang of it, application goes really smooth!


I applied two coats in the pictures here and the polish is flawless - no visible nail line and great colour. Unfortunately, this colour is a bit too beige and yellowish for my skin tone I think, but I do still like it a lot!

After that, I just drew a heart shape with a small brush and my red polish, and filled it in. I adore Caught on the Red Carpet, it's such a chique colour.


And that's it really! Easy nail art for Valentine's Day :)

I might do this design again in the coming week, because I'm not entirely happy with the colours I chose - the nude is, as I said, a bit too beige for me I think. So maybe this design would look better on top of naked nails (so without polish), of maybe with a very soft pink colour.


I'm normally not a big fan of Valentine's Day and all the hassle that comes with it, but I do love making nail art with hearts :) So prepare yourself for a lot more Valentine's Day themed nail art in the coming week! :)

Monday 3 February 2014

The Great Gatsby Nail Art


Hello all you great people!

I'm suuuper proud of today's design :D

I did The Great Gatsby inspired nails, and I love them a lot!
I always loved Great Gatsby nail art, I thought it was so elegant. But when the big hype about The Great Gatsby movie was around, I felt that I wasn't skilled enough to make such pretty nails.

But now I've decided that it was about time I tried them, and I'm very happy I did :)


I loved The Great Gatsby movie a lot - I even went to see it twice in the cinema - but I hadn't read the book until recently. I had to write a paper about the book so it had to analyze it in detail, and I fell in love even more with The Great Gatsby.

So I was convinced I had to make nail art based on the cover of the book and movie :)

The colours I used are:
11 - Hema
Goldfinger - Catrice
Black on Black - Sinful Colours

My design is based on Polly Polish' tutorial. I thought it was so fun that she first did a silver and gold gradient, so I decided to do that for my design as well.


I did this gradient using a sponge. I applied a fast drying top coat and then I used striping tape to create the design.


The design on my ring finger is based on the one by Polly Polish; the designs on my other fingers are my own creation.


I just put striping tape on my nails and made sure my nails were properly covered. Then I painted over my nails with black polish, and while the striping tape was still wet I took it off with tweezers.

And that's that really :)

Of course there were a few spots where a little black polish had come onto the gold and silver lines so I had to clean this up a bit, but overall this was a very succesful atempt at using striping tape - this was actually the first time I have managed to work this well with striping tape :D


Those of you who have read the book or seen the movie, you know to what light my green ring is referring to! :)


And a final shot with my Great Gatsby book! (yes, it's the Dutch translation because that one has the nice gold striped cover - I also have the book in English but with a completely different cover, so the Dutch one was more appropriate here)


What did you think of The Great Gatsby? Did you go see the movie or have you read the book?
I hope you enjoy my nails! :)

Thanks for reading!